3D printing has always been heralded as a world-changing technology. But until recently, gaining exposure to this cutting-edge space required a level of know-how beyond the average DIY tinkerer’s grasp. The Dremel 3D Idea Builder is designed specifically to make this powerful technology accessible to casual consumers. It’s affordable compared to competing models, incredibly easy to set up and ships with everything a buyer needs to get started with 3D printing right out of the box. And since it’s from Dremel, it’s also backed by a technical support team that’s dedicated to helping customers quickly if they run into trouble.
We spent a day with the machine in our offices and managed to build three separate projects in just a few hours with no previous experience with 3D printing. More importantly, we created items that we could actually use. In this short series, we’ll walk you through exactly how we did it.
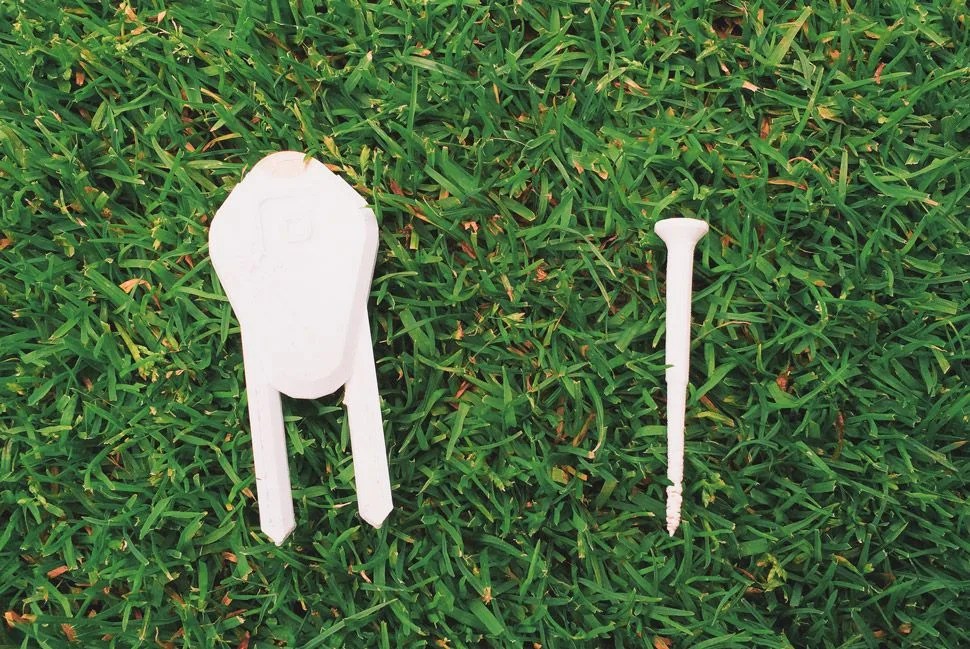
This project took approximately 30 minutes to print and required a minor amount of sanding to smooth out the final edges. The divot tool features a slot at the top to hold a dime as a ball marker. ou can download the project file to build this at home here.
1. Install the filament spool. The Dremel 3D Idea Builder ships with a spool of plastic filament that’s used to print objects. Place the spool onto the spool holder, ensuring the thread of plastic is being fed from the bottom of the spool towards the back of the printer. Next, insert the included spool lock and turn it 90 degrees to lock the filament into place.
2. Feed the filament through the filament guide. The filament guide looks like a plastic straw that runs from the back interior corner of the printer up to the upper-middle area of the printer’s back. Insert the filament rolled from the bottom of the spool into the bottom of the guide tube and push it all the way through.
3. Insert the filament into the extruder intake. The extruder is the “printer” part of the machine. It heats up and melts the filament into tiny droplets which are then layered to create objects. Take the filament extending from the top of the guide tube and insert it into the hole located on the top of the extruder head.
4. Put build tape over the build platform. Remove the plastic build platform from the printer by pressing the tab in front and lifting the base up. Dremel includes two sheets of branded build tape with the printer. Peel off the back layer of the build tape sheets and place the adhesive part on top of the clear plastic build platform.
5. Replace the build platform. Put the covered build platform back into the machine. Plug in the power cord and turn on the power switch located on the righthand side of the machine.
6. Complete filament load. Tap the “Tools” button on the Idea Builder’s integrated touch screen and then tap “Filament”, and then “Load Filament”. The extruder will then begin to heat. Once the appropriate temperature is reached, you’ll see a thin amount of plastic drip down from the extruder. Allow this to keep going for 10 seconds before tapping the “Return” button on the screen. Wait until the screen says “cool” in the upper right corner. Then remove the extruded plastic from inside.
7. Level the build platform. This final step of the initial setup process is also the most tedious. Press the “Tools” button on the printer’s touch screen and then tap “Level”. This will cause the extruder element to move over the front left corner of the build platform. Find the included leveling sheet — which looks like a bright orange piece of paper — and rest it flat on the build platform. Next, try to slide the level sheet between the tip of the extruder and the build platform. If the sheet passes easily underneath the extruder tip, you’ll need to turn the corresponding knob below the build platform clockwise to narrow the gap until the sheet passes underneath the extruder tip with a slight amount of resistance. If, on the other hand, the sheet cannot pass underneath the extruder tip, you’ll have to turn the knob counterclockwise until it can with a slight amount of resistance. Once satisfied, click “Next” on the touch screen and repeat the process two more times to level the front right corner and back of the build platform. Tap “Finish” on the screen once you’re done.
8. Find the project file. Dremel’s Idea Builder Portal includes hundreds of pre-designed projects that are easy to get working on. Simply browse through the library and click on the project that interests you. Next, click the download button to save the file locally to your computer, or use the site’s save feature to bookmark a project for later. Those with some basic experience in digital design can also leverage software like Autodesk’s 123D design tools to develop custom projects on their own. Feeling generous? Share your work with the Dremel Idea Builder community by submitting your model to the website. Here’s the link to the Golf Divot Tool and Tee project we used.
9. Transfer the file to the Idea Builder. There are two ways to add files to the printer. If your computer has a built-in microSD card slot, simply slide in the included card provided with the Dremel 3D Idea Builder. Next, unzip the project file downloaded from Dremel’s website and drag the files into the folder labeled “Projects”. From there, eject the SD card from your computer and insert the card into the slot located on the side of the printer. Users can also directly connect the printer to a computer via the included USB cable. After downloading the Idea Builder software, it’s easy to open project files and send them to the printer with just a few clicks. The same software can be used to tweak, scale and adjust projects if you’re feeling inventive.
10. Start Printing. If you’ve gone the SD card route, the next step is to tap “Build” on the touchscreen and then select the SD card option. Use the up and down arrows to find the file you want, then select it. Tap “Build” one more time and your project will start once the extruder has heated to the appropriate temperature. If you’ve attached a computer directly to the printer, hitting the “Build” button on the software will start the project automatically without you having to trigger any buttons on the Idea Builder’s touch screen.
The touch screen will provide a time estimate until completion at all times, along with buttons for pausing or stopping the project if need be. Once the job is done, the words “Object Finished” will appear on the screen. Press the check box to confirm the job is done and then wait for the machine to cool down. Remember to remove the entire build platform from the machine instead of trying to pull the printed object off of the platform. It should peel off using your hand. If need be, use the included scraper to remove the item from the platform.
Now sit back and admire your genius. You’ve just become a 3D printer.