GEAR PATROL SPONSORED POST
It’s really no secret that DSLR cameras are not only incredibly popular but increasingly easier to use. When the Canon AE-1 arrived on the scene many years ago during the film era, consumers were ecstatic at the camera’s excellent build quality, wide availability of creative lenses, and ease of use — all combined with a small form factor.
When the digital era hit, consumers flocked to point and shoots, but with mobile photography etching into the quality of point and shoots, DSLR cameras have once again become a widely sought after solution due to their combination of excellent optics and stunning image quality. So you want to shoot with a DSLR for gallery-quality photos, but the question remains: which gear should I use and how do I shoot better?
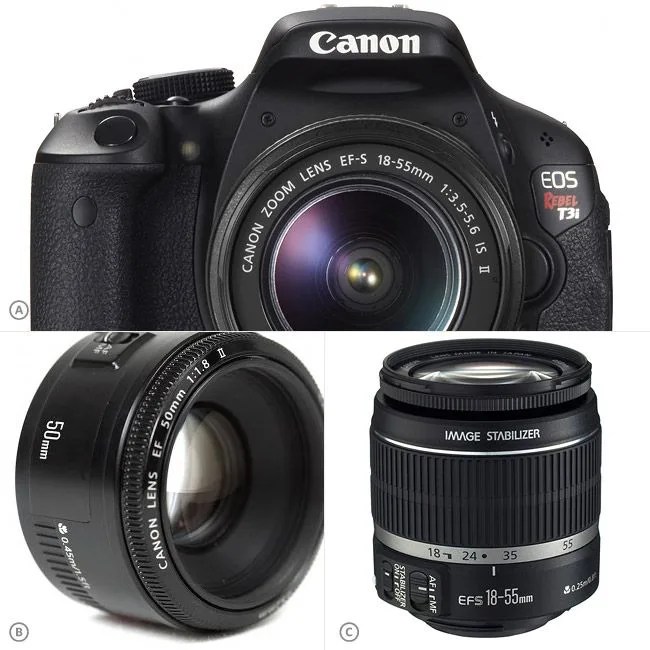
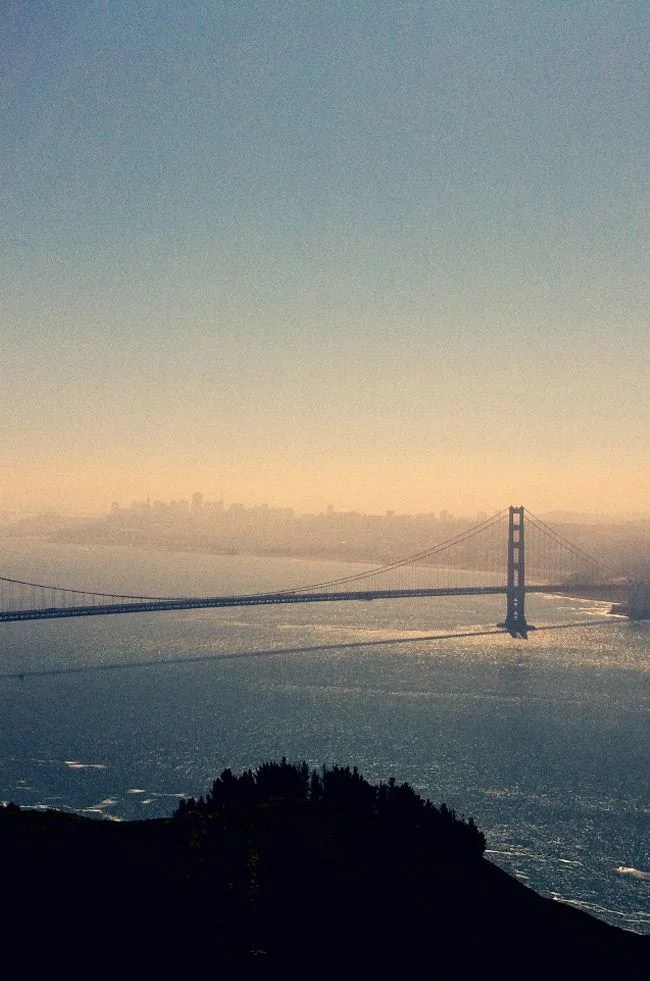
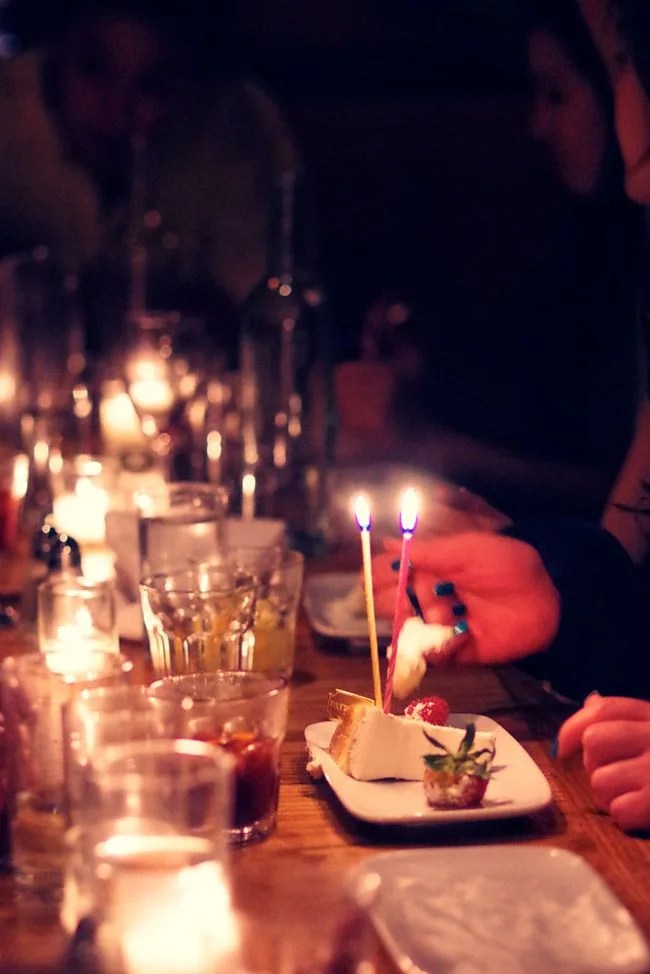
Teaming up with the good folks at Canon, the camera buffs at Gear Patrol have put a multi-part series pairing widely available Canon camera gear with editor insights on shooting better photos. First up, using the approachable and well-priced Canon Rebel T3i to shoot three everyday scenarios: portraits, landscapes and low-light shooting.
Special thanks to Canon for helping make this photography post series possible. Canon, Get Behind the Lens
Sharp Shooter Series
Part 1: Get a Grip on Your DSLR | Part 2: How to Capture Your City | Part 3: How to Shoot the Night
Our Setup
A. Canon Rebel T3i ($799, lens included), B. Canon 18-55mm IS II f/3.5-5.6 ($199), C. Canon EF 50mm 1.8 II ($125)
Portraits, aka Better Photos of Friends and Family
There are a several key tips to remember when shooting portraits.
Natural Light: It’s not just beautiful, it’s just about the best tool you have outside of your camera. Shooting in areas shrouded with light shadows will provide you with the best color and look overall. For example, if you’re shooting under an awning, then you should move to where the lighter shadows and darker shadows are starting to just taper (feather) off. Though we captured this photo in a moment of spontaneity, we made sure to position ourselves to keep the light at its least harsh direction by using a nearby overhang.
Rule of Flash: Let’s keep it simple. Avoid using the pop-up flash. It provides harsh shadows that will not flatter your subject. If you absolutely need to, consider having a Macgyver moment and fold up a sheet of paper and hold it in front of the flash to redirect (bounce) the light towards the ceiling. This will reduce the harshness of the flash. Consistent results are not guaranteed.
Wider=Distortion: The wider your focal length, the more distorted and unsightly your subject will look. As a rule of thumb consider these tips depending on what focal range you are shooting. As a reference, the photograph above was taken at 85mm.
- 35mm: Portrait of the person showcasing 1/3rds of their body.
- 50mm: Portrait of the person showcasing 2/3rds of their body.
- 80mm+: The entire person or something reasonably close/tight (like our photo above). In photos at this range, there will be minimal distortion to the subject and likely result in a more flattering photo. There’s a reason why this length is used in so many wedding photos.
Portrait Tips:
- Try to shoot with your lens wide open. (f/1.4-2.8) Shoot in Aperture priority (Av on Canon cameras) or set it in manual mode.
- Use a single point of focus and move it around using the directional controls on the back of the camera.
- Ask your subject turn his/her slightly so that the subject’s nose is facing roughly a 75 degree angle.
- Ask your subject to stick his/her neck out slightly and pull the shoulders back. This will flatten the subject’s jawline and provide a more flattering perspective
For Even Better Results: Consider upgrading to a lens like a Canon EF 50mm 1.8 II ($125). On your APS-C Sensor Canon DSLR, which the Rebel T3i is, the lens will render roughly an 80mm field of view. A term known as cropping factor. Amongst seasoned shooters this well-priced lens, also known as the “nifty 50”, is legendary for its affordable price and exceptionally sharp image quality. We have a handful of these lenses at the GP offices and they’re almost always in our kit bag.
Frame Worthy Landscapes
If you’re using your Canon 18-55mm IS II f/3.5-5.6 ($199) kit lens like the one included with the EOS Rebel T3i kit then you’ll be very happy to know that the lens covers nearly a wide variety of day-to-day ranges, including landscapes. Despite what you might think, shooting powerful landscape photos can be tricky. In general, though, you will want to focus all the way out to what the lens declares as, “infinity.” A general rule of thumb here is that infinity means most everything in your wide landscape will be in focus.
First: Try to focus on composition. The human-eye looks at a photo and tries to make sense of the geometry presented in it. With that in mind, work on utilizing the use of lines, curves, and very importantly, space. For example, let’s say you’re shooting a cityscape. The elements in the photo will be buildings, streets, and the variables that appear in the sky (clouds, sun, moon, etc.)
Rule of Thirds: Imagine your photo has nine equally-sized sections arranged 3×3, and delineated by straight lines. This rule recommends that you compose the critical elements of your photo on said lines. Having the primary focus of your photo out of the center area typically yields more interesting photos. If you’re shooting a cityscape (more on that in an upcoming post), try to place buildings or streets on those lines and also try to pay attention to the intersecting areas.
Luckily, there are some extra aids for this. To help you compose your photo, turn on the camera’s grid in the viewfinder or in Live View mode. The Canon Rebel T3i also features an electronic level to help you keep your photos’ horizon even.
Facebook or Print: If you’re shooting photos that will ultimately end up on Facebook, we recommend shooting at f/5.6 for landscape photos. The landscape setting (the mountain icon) on the mode dial will offer assistance when you just want to point and shoot, but for the absolute best photos with minimal need for editing afterwards, we recommend shooting landscapes in manual mode.
If you want to print your photos, consider shooting at f/11 or f/16. This is where you may want to bump up your ISO number a bit depending on the lighting available, or to yield a grainy photo, consider cranking your ISO up to a higher figure like 1600.
For Even Better Results: Later on, consider adding in polarizers and neutral density filters, which help tone down the amount of light captured in your photography, primarily skies.
Low Light Shooting, or “Getting Rid of the Shakes”
There’s an attraction with shooting photos at night or in low light conditions where the ambiance can really flatter a subject. This is where a DSLR truly shines with its larger sensor and fast lenses, like the Canon EF 50mm 1.8 II ($125).
Turn the Flash Off The DSLR has various automatic settings for this, typically called “twilight” or “no flash” setting. To find it quickly on the Canon Rebel T3i. But for the absolute best photos in low light situations, we think you’re best off shooting in Program (P), Aperture (Av), Shutter (Tv), Flash off, or Manual (M) mode.
The primary reason we recommend these modes is they avoid use of the pop-up flash, which spews out sub-optimal light at your subjects. Instead, manually or let your camera raise its ISO levels. The DSLR camera avoids much of the “noise” that plagues high ISO levels, but don’t always look at noise as bad. Sometimes, noise can replicate the rich feel of vintage photos — a trend that’s widely popular in photography today.
Hunting Season is Over: If you find that your camera’s autofocus “hunts” (constantly focusing in and out) for a subject to hone in on, try to manually select a focusing point beforehand based on your intended composition of the scene. Do this directly with the focusing ring on your lens.
For Even Better Results: Use the viewfinder because it help you to to keep your camera steady, and reduces the effects of camera shake (or those two beers you’ve had at the party already.) Bringing the camera to your eye also stabilizes it by providing another point of stability. For even more support, tuck your elbows into your chest and hold your breath when you’re about to take your photo. At the top of your breath, fire a shot or two and then relax.
So get out there and experiment with these tips. You’ll find that with practice and the persistence to take a lot of shots, you’ll come up with photos you’re proud of. We’ll beef up your repertoire in the coming weeks with more tips and tricks.
Sharp Shooter Series
Part 1: Get a Grip on Your DSLR | Part 2: How to Capture Your City | Part 3: How to Shoot the Night